Summary
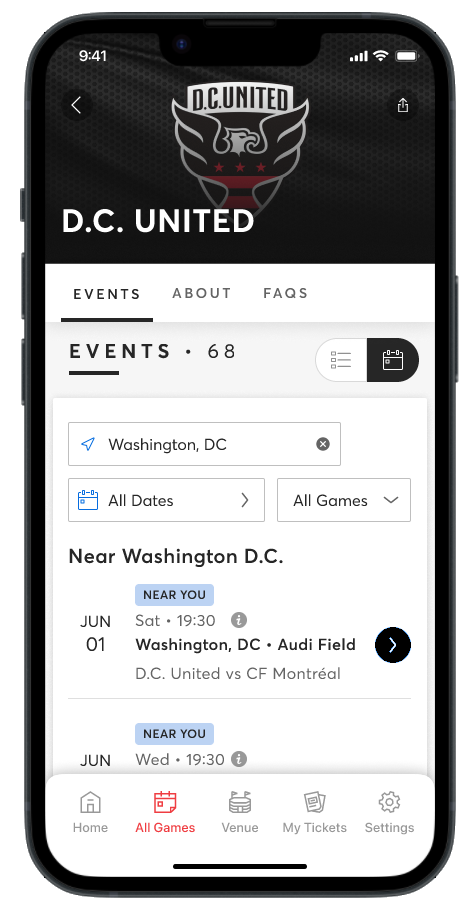
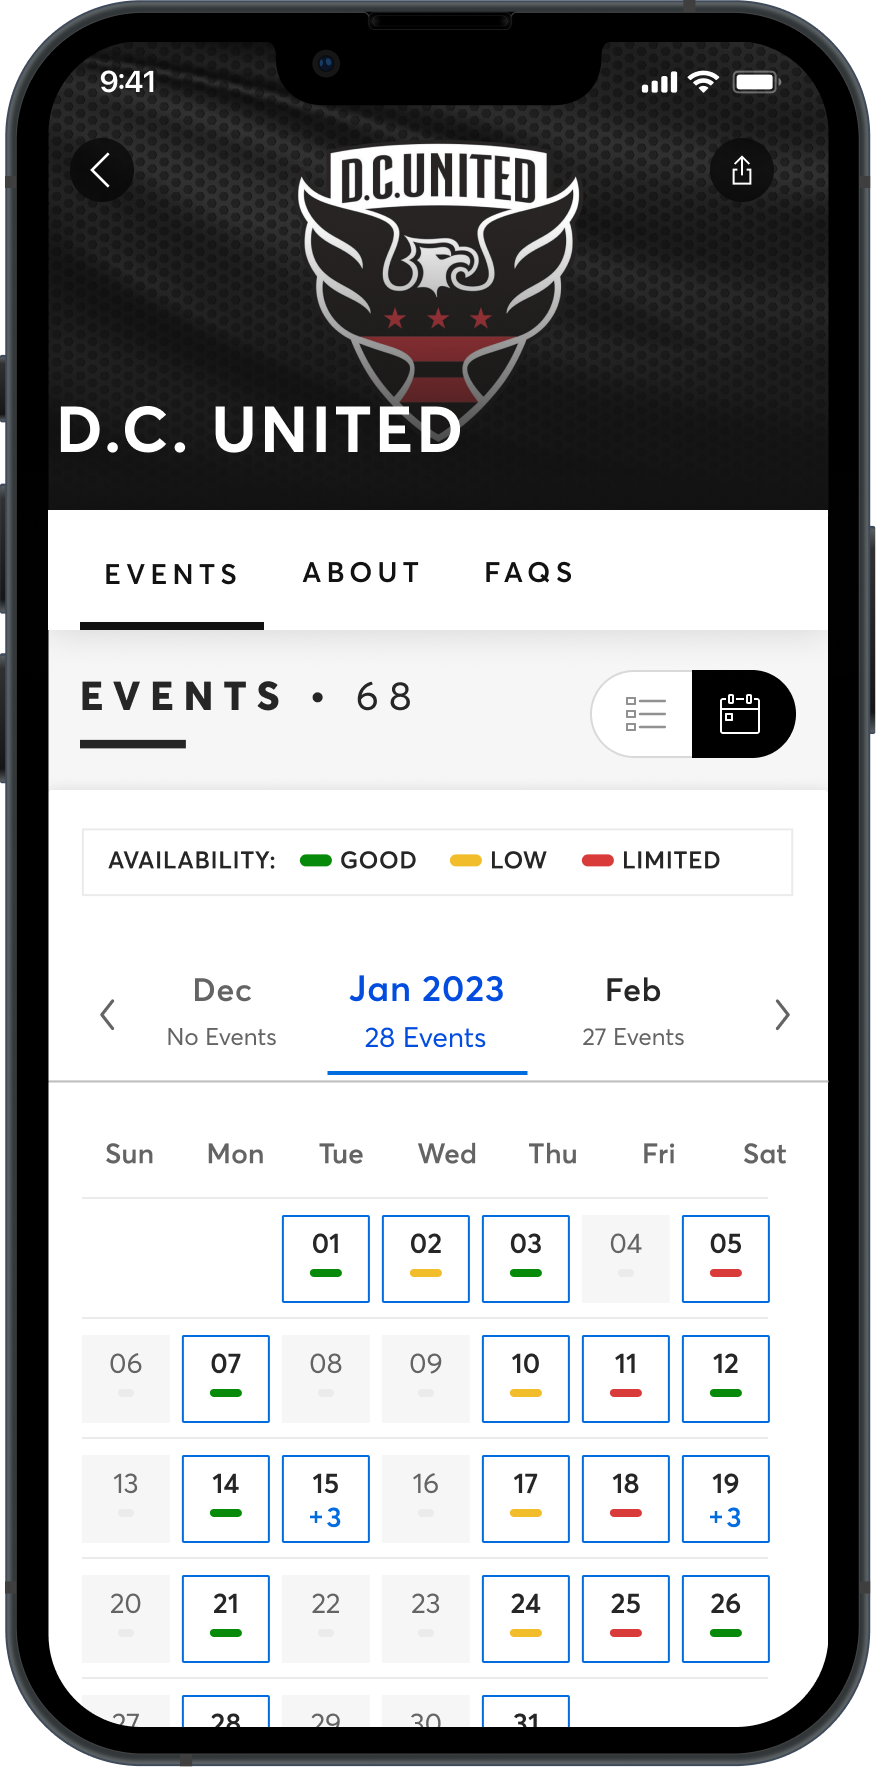
The Attraction Detail Page (ADP) is one of the starting points for PrePurchase flow. This allows the fan to view any events available for the provided Attraction. The displayed events can be filtered by date or location
Features
For each Attraction fans can update the location to obtain Events occurring near the provided location, as well as any other Events for the current Market. Each Event contains an overflow menu which displays the current Attraction's Line up, Venue information, and begin Purchase flow to view ticket selection for the Event. Fans can read and post reviews, and view the Biography for the Attraction.
Note
Using our SDK's requires a valid API Key. If you do not already have one, simply head to the Ticketmaster Developer Portal
Creating an Attraction Detail Page (ADP)
To start ADP flow you must provide the Attraction ID when initializing TMPrePurchaseViewController. Before creating attraction view controller, configure PrePurchase SDK, refer to the Customize Branding section. Syntax for initializing attraction view controller requires attractionIdentifier.
//Passing attractionIdentifier
TMPrePurchaseViewController.attractionDetailsViewController(attractionIdentifier: String,
marketDomain: MarketDomain = .US,  // Set valid marketDomain based on your region - US or AU or UK etc
enclosingEnvironment: EnclosingEnvironment)
Example:
let viewController = TMPrePurchaseViewController.attractionDetailsViewController(attractionIdentifier: "1646704",
marketDomain: .US, // Set valid marketDomain based on your region - US or AU or UK etc
enclosingEnvironment:.tabBarController)

/// Setting analytics delegate
viewController.analyticsDelegate = self

/// Setting navigation delegate
viewController.navigationDelegate = self

/// Setting location delegate
viewController.locationDelegate = self
Analytics delegate:
/// Analytics Delegate Methods
public protocol TMPrePurchaseAnalyticsDelegate: AnyObject {

    // MARK: User Behavior Analytics

    /// user has just shared this ADP/VDP page
    func prePurchaseViewController(_ viewController: TMPrePurchaseViewController,
                                   didShare pageTitle: String,
                                   and pageURL: URL,
                                   to activityType: UIActivity.ActivityType)

    // MARK: UAL Webpage Analytics

    /// PrePurchase webview has fired a pageView
    func prePurchaseViewController(_ viewController: TMPrePurchaseViewController,
                                   didFirePageView pageView: UALPageView)
}
Navigation delegate:
// Navigation Delegate Methods
public protocol TMPrePurchaseNavigationDelegate: AnyObject {

    /// PrePurchase needs to open an EDP (Event Details Page) to possibly make a purchase.
    ///
    /// - Note: Your code needs to initialize and display the Purchase SDK here
    ///
    /// - Parameters:
    ///   - eventIdentifier: Event identifier
    func prePurchaseViewController(_ viewController: TMPrePurchaseViewController,
                                   navigateToEventDetailsPageWithIdentifier eventIdentifier: String)
}
Location delegate:
public protocol TMPrePurchaseLocationDelegate: AnyObject {
    // Called when user uses web UI to change the current market
    func prePurchaseViewController(_ viewController: TMPrePurchaseViewController,
                                   didChangeLocationTo location: MarketLocation)

    // Called when the user taps Use Current Location.
    // The integrating app, once receiving this callback, is expected to ask for device location, possibly triggering permission prompt in the process. And then respond with either of the two public functions, depending on the outcome.
    func prePurchaseViewControllerDidRequestCurrentLocation(_ viewController: TMPrePurchaseViewController)
}
For detailed explanation of location flow please refer to Location-Based Functionality for the ADP
To start the ADP flow, you'll need a few things: First, you must provide an Attraction ID and use it to create a DiscoveryAttraction(val attractionID : String) instance.
Afterwards, add the DiscoveryAttraction instance as a constructor parameter to your TMPrePurchaseWebsiteConfiguration instance. TMPrePurchaseWebsiteConfiguration requires a discoveryAttraction instance and marketDomain (US & UK).
There are optional parameters such as a boolean to control Share Item visibility, Brand Name, Discrete ID and Came From Code, etc if you inspect the TMPrePurchaseWebsiteConfiguration model.
import com.ticketmaster.discoveryapi.enums.TMMarketDomain
import com.ticketmaster.discoveryapi.models.DiscoveryAbstractEntity
import com.ticketmaster.discoveryapi.models.DiscoveryAttraction
import com.ticketmaster.discoveryapi.models.DiscoveryVenue
import com.ticketmaster.prepurchase.TMPrePurchase
import com.ticketmaster.prepurchase.TMPrePurchaseWebsiteConfiguration


val attractionID: String = "1646704"

val discoveryAttraction: DiscoveryAbstractEntity? = DiscoveryAttraction(hostID = attractionID)

val tmPrePurchaseWebsiteConfiguration = TMPrePurchaseWebsiteConfiguration(
      discoveryAttraction,                 // required
      TMMarketDomain.US,                   // required
      showShareToolbarButton = true,       // optional
      ...........
)
Create a TMPrePurchase instance containing your brand color and apiKey
// Create a TMPrePurchase instance

val tmPrePurchase = TMPrePurchase(
  ContextCompat.getColor(
     this,
     R.color.black_pearl
   ),
   apiKey
)
Create a fragment factory to implement interfaces that your app can use to receive useful information from the SDK as you build the ADP view.
- The factory uses the following optional listeners: TMPrePurchaseSharingListener, TMPrePurchaseUserAnalyticsListener, TMPrePurchaseWebAnalyticsListener.
- The factory has the following required listener so you can handle navigation when PrePurchase has closed and other action items: TMPrepurchaseNavigationListener. This listener has the onPrePurchaseClosed callback that is accessible to you so you can close the activity or do whatever seems best for your app at that moment. Closing the activity that launched PrePurchase in the first place most likely will be your use case, as shown in the code block example below.
Set the factory to the FragmentManager for it to create the Fragment instance.
// NOTE: The code block below will exist in the onCreate() lifecycle method of your Activity

class PrePurchaseNavigationListener(val closeScreen: () -> Unit):TMPrePurchaseNavigationListener {
  .........
  override fun onPrePurchaseClosed() {
    closeScreen.invoke()
  }
}

private val integratorFactory: TMPrePurchaseFragmentFactory by lazy {
TMPrePurchaseFragmentFactory(
   tmPrePurchaseNavigationListener = PrePurchaseNavigationListener() {
      // close the activity in this example
      finish()
   },
   tmPrePurchaseShareListener = TMPrePurchaseSharingListener(),
   tmPrePurchaseUserAnalyticsListener = TMPrePurchaseUserAnalyticsListener(),
   tmPrePurchaseWebAnalyticsListener = TMPrePurchaseWebAnalyticsListener()
 )
}

supportFragmentManager.fragmentFactory = integratorFactory
Using the TMPrePurchase instance and its getPrePurchaseBundle convenience method, create a bundle with TMPrePurchaseWebsiteConfiguration. This newly made bundle will then be added to TMPrePurchaseFragmentFactory as an argument. Once this is done, the provided fragment instance from the factory may be used to start ADP.
val bundle: Bundle = tmPrePurchase.getPrePurchaseBundle(tmPrePurchaseWebsiteConfiguration)

val fragment = integratorFactory.instantiatePrePurchase(classLoader).apply {
  arguments = bundle
}


supportFragmentManager.beginTransaction()
  .add(android.R.id.content, fragment)
  .commit()