Custom Modules, iOS
- 15 Jan 2025
- 10 Minutes to read
- Contributors

- Print
- DarkLight
Custom Modules, iOS
- Updated on 15 Jan 2025
- 10 Minutes to read
- Contributors
- Print
- DarkLight
Article summary
Did you find this summary helpful?
Thank you for your feedback!
Summary
A TMTicketsModule is defined by three values:
- A unique identifier string
- An optional Header View
- 0 to 3 Buttons
See: TMTicketsModule(identifier:headerDisplay:actionButtons:)
Modules are built and returned in TMTicketsModuleDelegate.addCustomModules(event:completion:)
extension MyClass: TMTicketsModuleDelegate {

    func addCustomModules(event: TMPurchasedEvent, completion: @escaping ([TMTicketsModule]?) -> Void) {
        // build a UIView
        let view = UIView()
        view.backgroundColor = .red

        // build Header with UIView
        let header = TMTicketsModule.HeaderDisplay(view: view)

        // build buttons
        let button1 = TMTicketsModule.ActionButton(title: "One")
        let button2 = TMTicketsModule.ActionButton(title: "Two")
        let button3 = TMTicketsModule.ActionButton(title: "Three")

        // build module with header and buttons
        let module = TMTicketsModule(identifier: "com.myDemoApp.demoModule",
                                    headerDisplay: header,
                                    actionButtons: [button1, button2, button3])

        // return modules in display order
        completion([module])
    }
}
Output:
Let's examine each of these three values in detail.
Identifier
A globally unique indentifier is best to avoid conflicts with any internal or pre-built module names.
We recommend using a reverse URL style.
Unique examples:
- "com.ticketmaster.seatUpgrades"
- "com.nfl.broncosSeating"
- "com.myDemoApp.demoModule"
Header
While optional, the Header is the most easily visible component of a Module.
A Header (TMTicketsModule.HeaderDisplay) is simply a wrapper around a UIView.
Note that a Module can contain a Header with no Buttons, or Buttons with no Header.
Size
The Header is automatically resized to the width of the user's phone, so you can only really control the height. This is done by setting an aspect ratio.
The default aspect ratio (3x2) is recommended for visual consistancy.
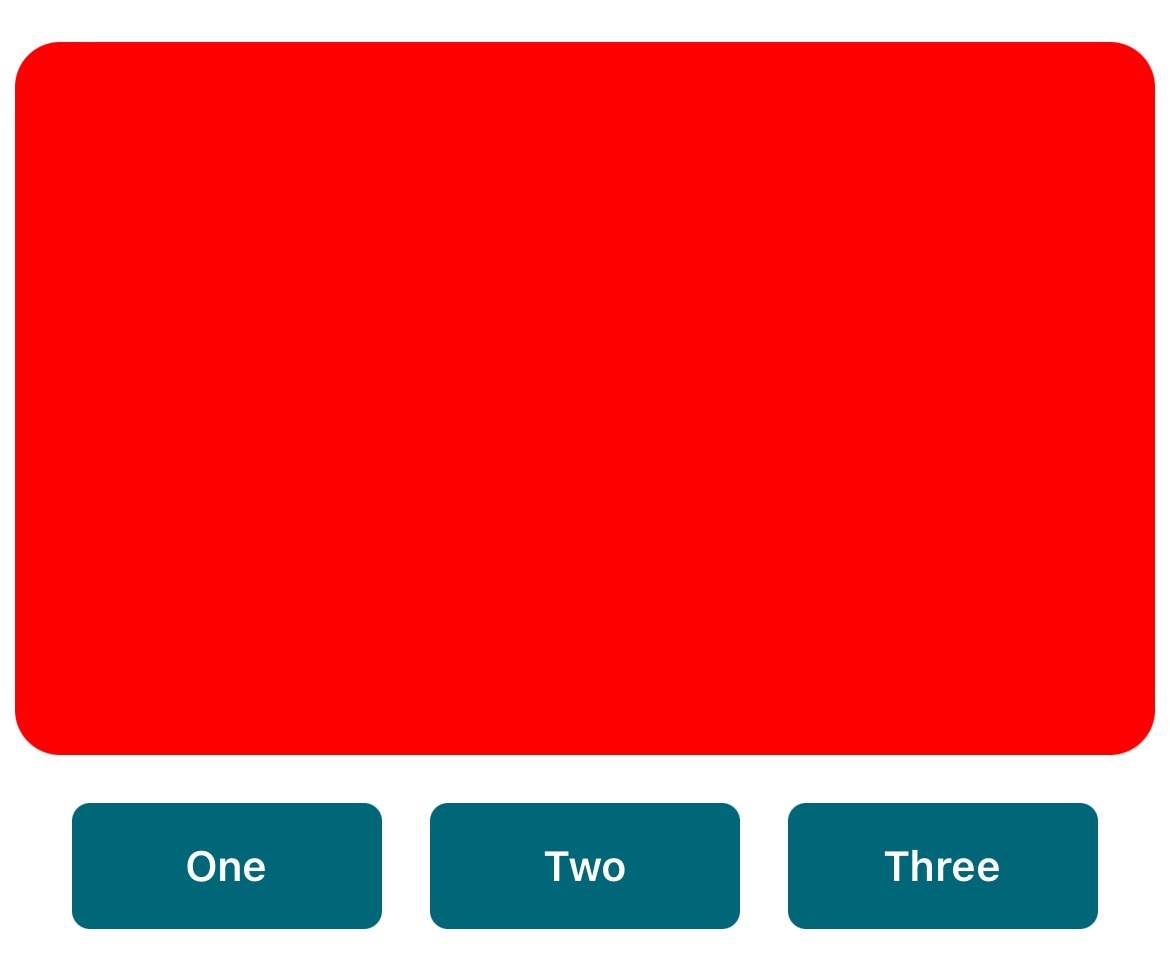
Header Default Aspect Ratio
- Build a module with a Red header, using the default aspect ratio (3x2).
func addCustomModules(event: TMPurchasedEvent, completion: @escaping ([TMTicketsModule]?) -> Void) {
    // build a UIView (with default aspect ratio 3x2)
    let view = UIView()
    view.backgroundColor = .red

    // build header with UIView
    let header = TMTicketsModule.HeaderDisplay(view: view)

    // build buttons
    let button1 = TMTicketsModule.ActionButton(title: "One")
    let button2 = TMTicketsModule.ActionButton(title: "Two")
    let button3 = TMTicketsModule.ActionButton(title: "Three")

    // build module with header and buttons
    let module = TMTicketsModule(identifier: "com.myDemoApp.demoModule",
                                 headerDisplay: header,
                                 actionButtons: [button1, button2, button3])

    // return module
    completion([module])
}
- Output:
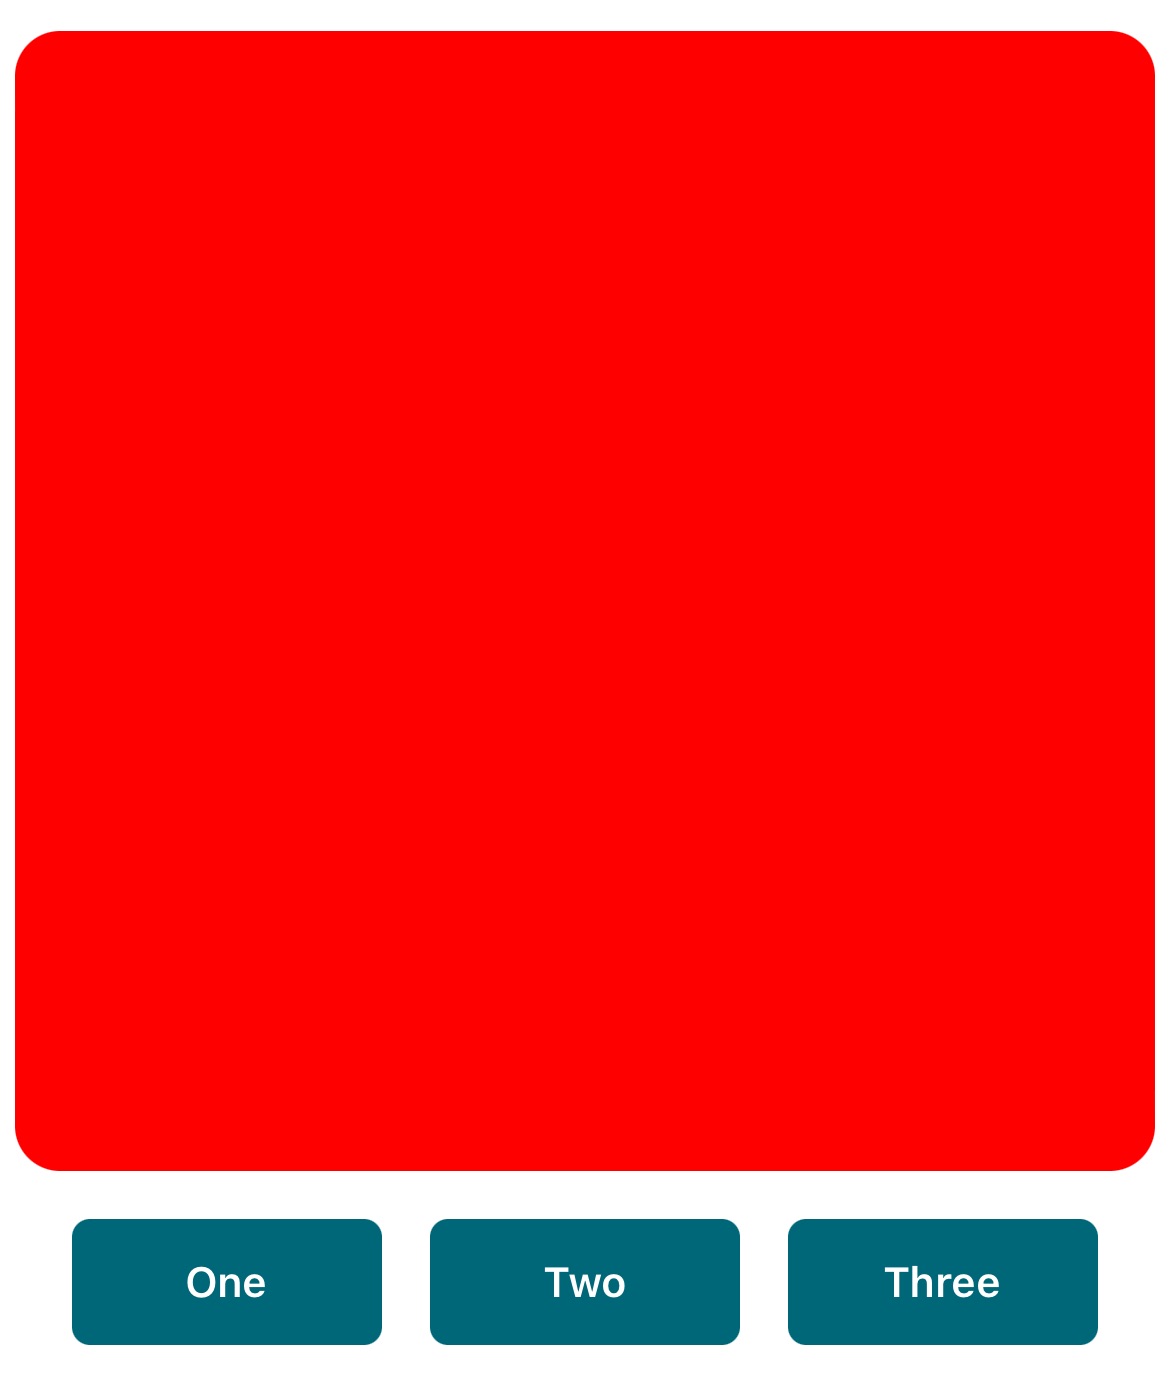
Header Custom Aspect Ratio
The Header inherits it's aspect ratio from the provided UIView, so by setting the size of the UIView you can alter the aspect ratio of the Header.
- Build a module with a Red header, using a custom defined aspect ratio (1x1).
func addCustomModules(event: TMPurchasedEvent, completion: @escaping ([TMTicketsModule]?) -> Void) {
    // build a UIView (with a defined aspect ratio)
    let view = UIView(frame: CGRect(x: 0, y: 0, width: 1, height: 1))
    view.backgroundColor = .red

    // build header with UIView
    let header = TMTicketsModule.HeaderDisplay(view: view)

    // build buttons
    let button1 = TMTicketsModule.ActionButton(title: "One")
    let button2 = TMTicketsModule.ActionButton(title: "Two")
    let button3 = TMTicketsModule.ActionButton(title: "Three")

    // build module with header and buttons
    let module = TMTicketsModule(identifier: "com.myDemoApp.demoModule",
                                 headerDisplay: header,
                                 actionButtons: [button1, button2, button3])

    // return module
    completion([module])
}
- Output:
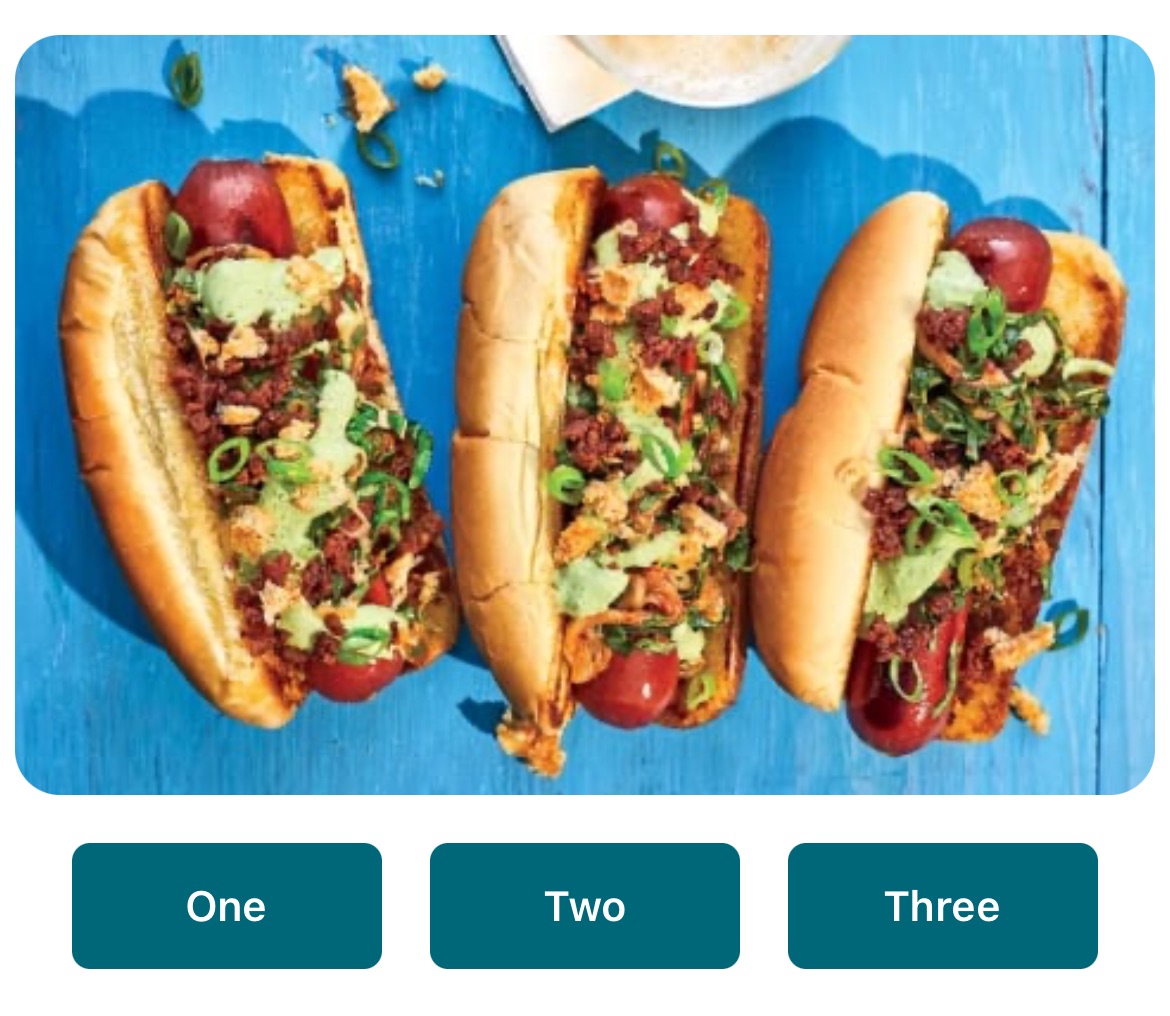
Header Custom Image
Headers can also be created with a UIImage (as a convenience). The aspect ratio of the Header is inherited from the size of the UIImage.
- Build a module with an Image header, aspect ratio is defined by Image size:
func addCustomModules(event: TMPurchasedEvent, completion: @escaping ([TMTicketsModule]?) -> Void) {
    // load UIImage
    let image = UIImage(imageLiteralResourceName: "HotDogs.jpg")

    // build header with UIImage
    let header = TMTicketsModule.HeaderDisplay(image: image)

    // build buttons
    let button1 = TMTicketsModule.ActionButton(title: "One")
    let button2 = TMTicketsModule.ActionButton(title: "Two")
    let button3 = TMTicketsModule.ActionButton(title: "Three")

    // build module with header and buttons
    let module = TMTicketsModule(identifier: "com.myDemoApp.demoModule",
                                 headerDisplay: header,
                                 actionButtons: [button1, button2, button3])

    // return module
    completion([module])
}
- Output:
HeaderView Builder
While you are welcome to build a Header using any UIView, a helpful Header builder has been provided.
The TMTicketsModuleHeaderView can help you quickly build a UIView for presentation.
The header builder supports:
- Three lines of custom Text
- Gradient overlay (from top-left and bottom-right corners)
- UIColor background
TMTicketsModuleHeaderView.configure(topLabelText:topLabelTextAlignment:centerLabelText:centerLabelTextAlignment:bottomLabelText:bottomLabelTextAlignment:gradientAlpha:backgroundColor:)
- UIImage background
TMTicketsModuleHeaderView.configure(topLabelText:topLabelTextAlignment:centerLabelText:centerLabelTextAlignment:bottomLabelText:bottomLabelTextAlignment:gradientAlpha:backgroundImage:)
- MKCoordinateRegion map
TMTicketsModuleHeaderView.configure(topLabelText:topLabelTextAlignment:centerLabelText:centerLabelTextAlignment:bottomLabelText:bottomLabelTextAlignment:gradientAlpha:mapCoordinateRegion:mapAnnotation:)
- QR Code
TMTicketsModuleHeaderView.configure(topLabelText:topLabelTextAlignment:centerLabelText:centerLabelTextAlignment:bottomLabelText:bottomLabelTextAlignment:gradientAlpha:backgroundImage:qrCodeValue:)
- 2D Barcode
TMTicketsModuleHeaderView.configure(topLabelText:topLabelTextAlignment:centerLabelText:centerLabelTextAlignment:bottomLabelText:bottomLabelTextAlignment:gradientAlpha:backgroundImage:barcode2DValue:)
- Audio/Video Content
TMTicketsModuleHeaderView.configure(topLabelText:topLabelTextAlignment:centerLabelText:centerLabelTextAlignment:bottomLabelText:bottomLabelTextAlignment:gradientAlpha:avContentURL:disableLoopingContent:disableAVAudio:)
HeaderView Builder: Color
- Build a module with a Red header, using the Header View builder:
func addCustomModules(event: TMPurchasedEvent, completion: @escaping ([TMTicketsModule]?) -> Void) {
    // build a UIView (with default aspect ratio 3x2)
    let headerView = TMTicketsModuleHeaderView.build()
    headerView.configure(backgroundColor: .red)

    // build header with HeaderView (a UIView)
    let header = TMTicketsModule.HeaderDisplay(view: headerView)

    // build buttons
    let button1 = TMTicketsModule.ActionButton(title: "One")
    let button2 = TMTicketsModule.ActionButton(title: "Two")
    let button3 = TMTicketsModule.ActionButton(title: "Three")

    // build module with header and buttons
    let module = TMTicketsModule(identifier: "com.myDemoApp.demoModule",
                                 headerDisplay: header,
                                 actionButtons: [button1, button2, button3])

    // return module
    completion([module])
}
- Output:
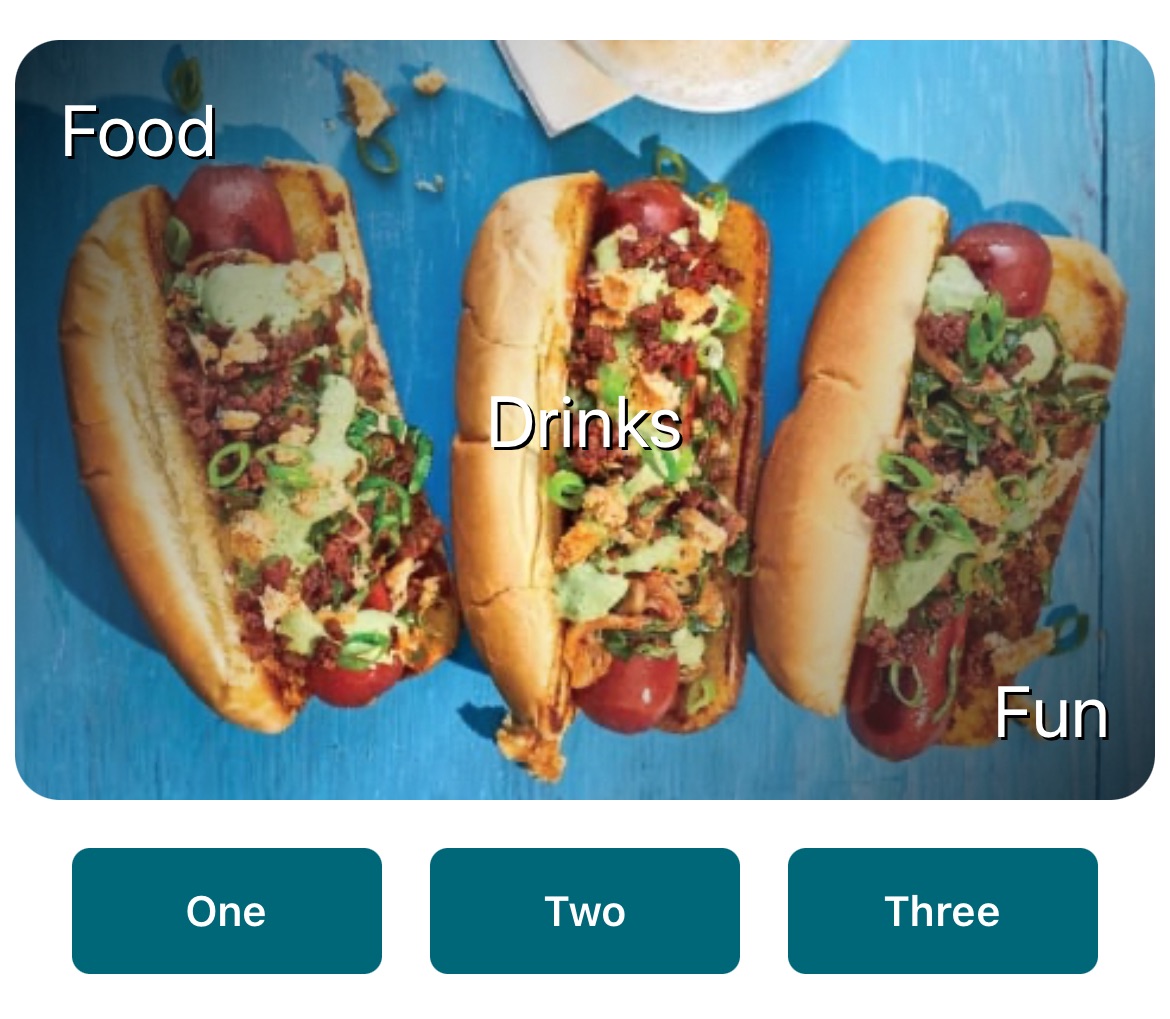
HeaderView Builder: Image + Text + Gradient
- Build a module with an Image, Text, and Gradient:
func addCustomModules(event: TMPurchasedEvent, completion: @escaping ([TMTicketsModule]?) -> Void) {
    // load UIImage
    let image = UIImage(imageLiteralResourceName: "HotDogs.jpg")

    // build a UIView with a text, gradient, and image
    let headerView = TMTicketsModuleHeaderView.build()
    headerView.configure(topLabelText: "Food",
                         topLabelTextAlignment: .left,
                         centerLabelText: "Drinks",
                         centerLabelTextAlignment: .center,
                         bottomLabelText: "Fun",
                         bottomLabelTextAlignment: .right,
                         gradientAlpha: 1.0,
                         backgroundImage: image)

    // build header with HeaderView (a UIView)
    let header = TMTicketsModule.HeaderDisplay(view: headerView)

    // build buttons
    let button1 = TMTicketsModule.ActionButton(title: "One")
    let button2 = TMTicketsModule.ActionButton(title: "Two")
    let button3 = TMTicketsModule.ActionButton(title: "Three")

    // build module with header and buttons
    let module = TMTicketsModule(identifier: "com.myDemoApp.demoModule",
                                 headerDisplay: header,
                                 actionButtons: [button1, button2, button3])

    // return module
    completion([module])
}
- Output:
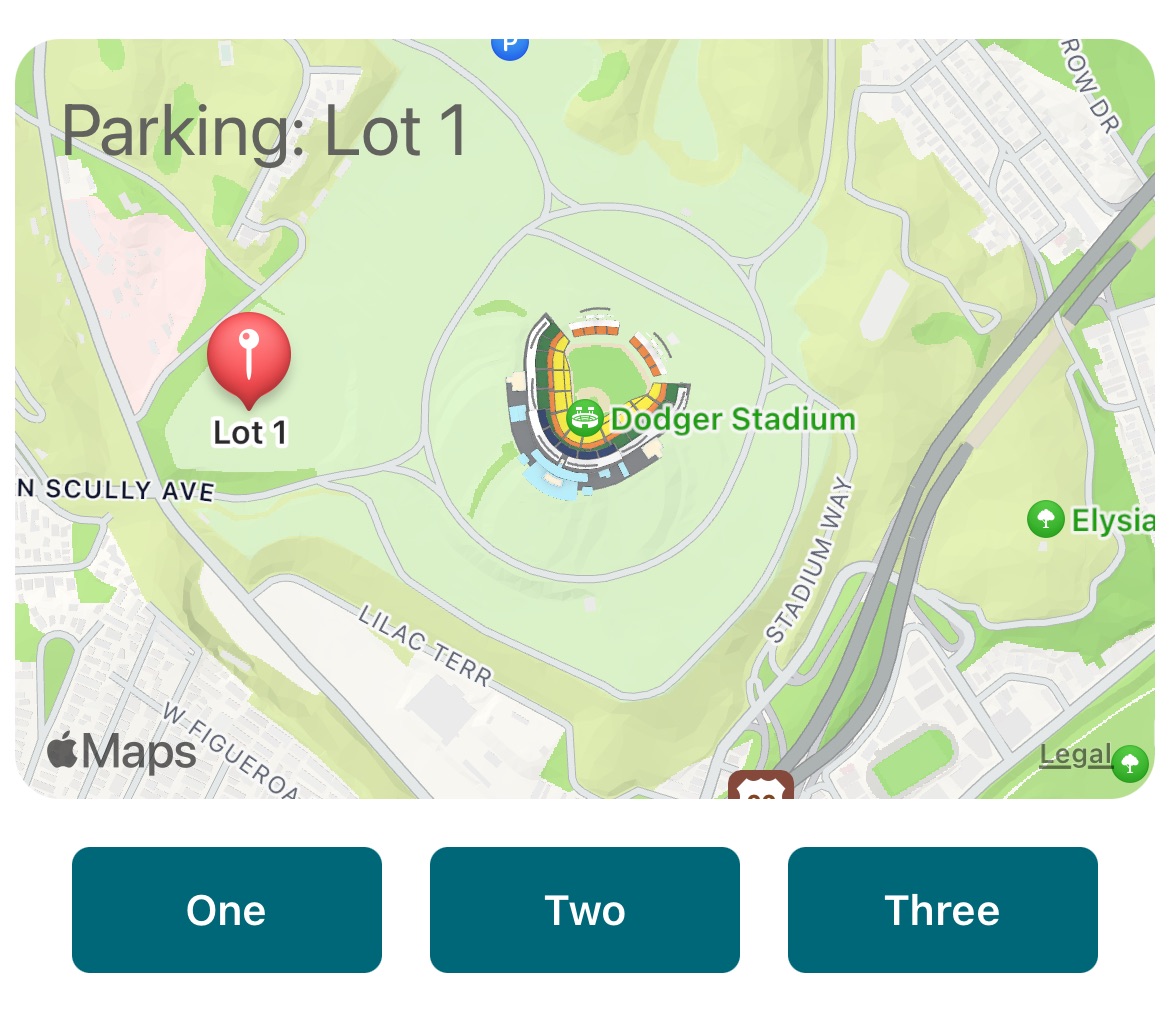
HeaderView Builder: Map
- Build a module with a Map and Text:
func addCustomModules(event: TMPurchasedEvent, completion: @escaping ([TMTicketsModule]?) -> Void) {
    // define map region and zoom (span)
    let mapRegion = MKCoordinateRegion(
        center: CLLocationCoordinate2D(latitude: 34.0734, longitude: -118.2402),
        span: MKCoordinateSpan(latitudeDelta: 0.02, longitudeDelta: 0.02))

    // define map point of interest
    let mapAnnotation = TMTicketsModuleHeaderView.MapAnnotation(
        coordinate: CLLocationCoordinate2D(latitude: 34.0735, longitude: -118.2456),
        title: "Lot 1")

    // build a UIView with a text, gradient, and image
    let headerView = TMTicketsModuleHeaderView.build()
    headerView.configure(topLabelText: "Parking: Lot 1",
                         mapCoordinateRegion: mapRegion,
                         mapAnnotation: mapAnnotation)

    // build header with HeaderView (a UIView)
    let header = TMTicketsModule.HeaderDisplay(view: headerView)

    // build buttons
    let button1 = TMTicketsModule.ActionButton(title: "One")
    let button2 = TMTicketsModule.ActionButton(title: "Two")
    let button3 = TMTicketsModule.ActionButton(title: "Three")

    // build module with header and buttons
    let module = TMTicketsModule(identifier: "com.myDemoApp.demoModule",
                                 headerDisplay: header,
                                 actionButtons: [button1, button2, button3])

    // return module
    completion([module])
}
- Output:
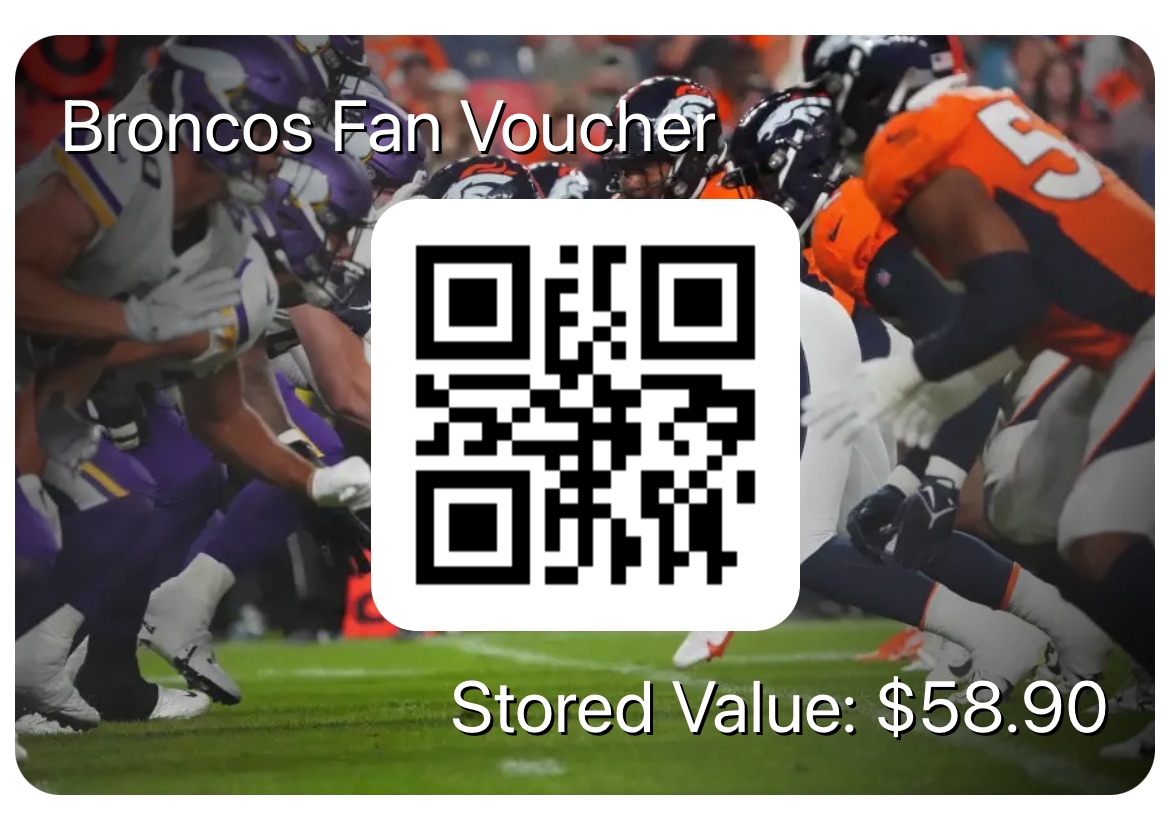
HeaderView Builder: QR Code
- Build a module with a QR Code, Image, Gradient and Text:
func addCustomModules(event: TMPurchasedEvent, completion: @escaping ([TMTicketsModule]?) -> Void) {
    // build a UIView with a text, QR code, gradient, and image
    let headerView = TMTicketsModuleHeaderView.build()
    headerView.configure(topLabelText: "Broncos Fan Voucher",
                         bottomLabelText: "Stored Value: $58.90",
                         gradientAlpha: 1.0,
                         backgroundImage: UIImage(named: "BroncosPlay.jpg"),
                         qrCodeValue: "1234567890ABCDEF")

    // build header with HeaderView (a UIView)
    let header = TMTicketsModule.HeaderDisplay(view: headerView)

    // build module with header, but no buttons
    let module = TMTicketsModule(identifier: "com.myDemoApp.demoModule",
                                 headerDisplay: header,
                                 actionButtons: nil) // no buttons

    // return module
    completion([module])
}
- Output:
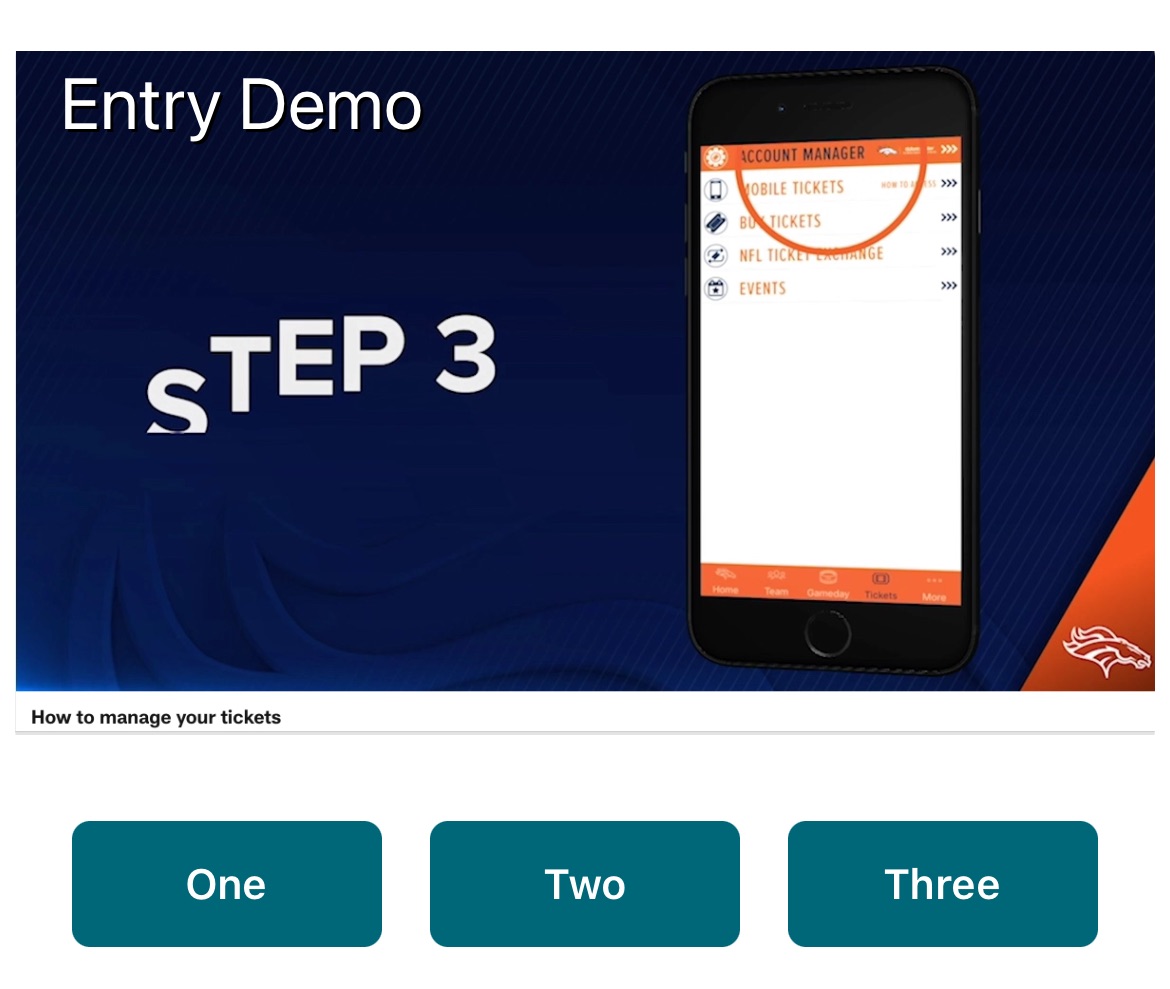
HeaderView Builder: Video
The video will start playing as soon as the user scrolls down to the module.
- Build a module with a Video and Text:
func addCustomModules(event: TMPurchasedEvent, completion: @escaping ([TMTicketsModule]?) -> Void) {
    // load video from local file or web URL
    let ticketsMovieURL = Bundle.main.url(forResource: "BroncosMobileTickets", withExtension: "mp4")!

    // build a UIView with a text, QR code, and image
    let headerView = TMTicketsModuleHeaderView.build()
    headerView.configure(topLabelText: "Entry Demo",
                         avContentURL: ticketsMovieURL)

    // build header with HeaderView (a UIView)
    let header = TMTicketsModule.HeaderDisplay(view: headerView)

    // build buttons
    let button1 = TMTicketsModule.ActionButton(title: "One")
    let button2 = TMTicketsModule.ActionButton(title: "Two")
    let button3 = TMTicketsModule.ActionButton(title: "Three")

    // build module with header and buttons
    let module = TMTicketsModule(identifier: "com.myDemoApp.demoModule",
                                 headerDisplay: header,
                                 actionButtons: [button1, button2, button3])

    // return module
    completion([module])
}
- Output:
Buttons
Buttons (TMTicketsModule/ActionButton) are assigned Actions that occur when the button is pressed.
Currently, only two Actions are supported:
- open a given webpage inside Tickets SDK (in a webview)
- callback to module delegate (inside your app)
Note that a Module can contain a Header with no Buttons, or Buttons with no Header.
Button Action: Callbacks
If webpage settings are not defined on the TMTicketsModule.ActionButton, then when the user presses the button, the callback method on the module delegate will be called: TMTicketsModuleDelegate.handleModuleActionButton(event:module:button:completion:)
- Build three buttons (with no header):
extension MyClass: TMTicketsModuleDelegate {

    func addCustomModules(event: TMPurchasedEvent, completion: @escaping ([TMTicketsModule]?) -> Void) {
        // build buttons
        let button1 = TMTicketsModule.ActionButton(title: "One")
        let button2 = TMTicketsModule.ActionButton(title: "Two")
        let button3 = TMTicketsModule.ActionButton(title: "Three")

        // build module with header and buttons
        let module = TMTicketsModule(identifier: "com.myDemoApp.demoModule",
                                     headerDisplay: nil, // no header
                                     actionButtons: [button1, button2, button3])

        // return module
        completion([module])
    }

    func handleModuleActionButton(
        event: TMPurchasedEvent,
        module: TMTicketsModule,
        button: TMTicketsModule.ActionButton,
        completion: @escaping (TMTicketsModule.WebpageSettings?) -> Void) {

        // this is not called if webpage settings are already defined
        if module.identifier == "com.myDemoApp.demoModule" {
            if button.callbackValue == "One" {
                print("Action: One")
                // handle in your own code, do not close modal Tickets Listing page
                // do not call completion
                handle(button: button)

            } else if button.callbackValue == "Two" {
                print("Action: Two")
                // handle in your own code, but first close modal Tickets Listing page
                // call completion with nil
                completion(nil)
                handle(button: button)

            } else if button.callbackValue == "Three" {
                print("Action: Three")
                // open a webpage inside Tickets SDK (webview)
                let request = URLRequest(url: URL(string: "https://www.mlb.com")!)
                let settings = TMTicketsModule.WebpageSettings(pageTitle: "MLB Homepage",
                                                               urlRequest: request)
                // call completion with webpage settings
                completion(settings)
            }
        }
    }
}
- Output:

Button Action: Callback Completion
Notice that the handleModuleActionButton delegate method has a completion closure.
This is used to inform Tickets SDK of which behavior you would like when the user presses a Module Button.
- Do not close modal Tickets Listing page and handle button in your own code:
if button.callbackValue == "One" {
    print("Action: One")
    // handle in your own code, do not close modal Tickets Listing page
    // do not call completion
    handle(button: button)
- Close modal Tickets Listing page first, then handle button in your own code:
} else if button.callbackValue == "Two" {
    print("Action: Two")
    // handle in your own code, but first close modal Tickets Listing page
    // call completion with nil
    completion(nil)
    handle(button: button)
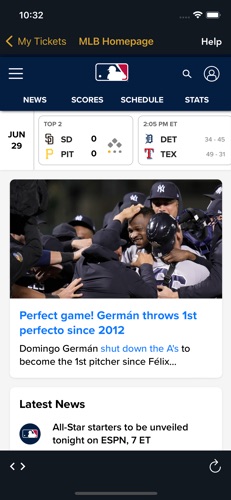
- Do not close modal Tickets Listing page, have Tickets SDK open a webpage for you:
} else if button.callbackValue == "Three" {
    print("Action: Three")
    // open a webpage inside Tickets SDK (webview)
    let request = URLRequest(url: URL(string: "https://www.mlb.com")!)
    let settings = TMTicketsModule.WebpageSettings(pageTitle: "MLB Homepage",
                                                   urlRequest: request)
    // call completion with webpage settings
    completion(settings)
- Output:
 {
{
Button Action: Webpage Settings
You can provide the Button webpage settings ahead of time instead of waiting for the callback.
Note that when this is the case, the handleModuleActionButton delegate method will not be called.
- Build one button with pre-defined webpage settings (with no header):
func addCustomModules(event: TMPurchasedEvent, completion: @escaping ([TMTicketsModule]?) -> Void) {
    // build webpage settings
    let request = URLRequest(url: URL(string: "https://www.mlb.com")!)
    let settings = TMTicketsModule.WebpageSettings(pageTitle: "MLB Homepage",
                                                   urlRequest: request)

    // build buttons
    let button1 = TMTicketsModule.ActionButton(title: "One",
                                               webpageSettings: settings)

    // build module with header and buttons
    let module = TMTicketsModule(identifier: "com.myDemoApp.demoModule",
                                 headerDisplay: nil, // no header
                                 actionButtons: [button1])

    // return module
    completion([module])
}
- Output:
{
Button Action: Webpage Settings + State
Typically you will want to pass in some state variables to the webpage. For example, maybe which event the user is viewing.
- This can be done with URL parameters.
You may also want to pass values securely. For example, the user's login state (oauth token).
- This can be done with
TMTicketsModule.OAuthCookieSettings.
Example:
- Build button with pre-defined webpage settings including eventID and user OAuthToken:
func addCustomModules(event: TMPurchasedEvent, completion: @escaping ([TMTicketsModule]?) -> Void) {
    // build cookie settings
    let cookie = TMTicketsModule.OAuthCookieSettings(name: "userAuth",
                                                     value: "oauthToken1234",
                                                     webDomains: [".mlb.com"])

    // build webpage settings with parameters
    let request = URLRequest(url: URL(string: "https://www.mlb.com?event=\(event.info.identifier)")!)
    let settings = TMTicketsModule.WebpageSettings(pageTitle: "MLB Homepage",
                                                   urlRequest: request,
                                                   oauthCookieSettings: cookie)

    // build buttons
    let button1 = TMTicketsModule.ActionButton(title: "One",
                                               webpageSettings: settings)

    // build module with header and buttons
    let module = TMTicketsModule(identifier: "com.myDemoApp.demoModule",
                                 headerDisplay: nil, // no header
                                 actionButtons: [button1])

    // return module
    completion([module])
}
- You can also easily attach Ticketmaster OAuth Tokens this way:
func addCustomModules(event: TMPurchasedEvent, completion: @escaping ([TMTicketsModule]?) -> Void) {
    // build cookie settings (attaching Ticketmaster Archtics Modern Accounts token)
    let cookie = TMTicketsModule.OAuthCookieSettings(name: "tmOAuth",
                                                     webDomains: [".mlb.com"],
                                                     backend: .TeamModernAccounts)

    // build webpage settings with parameters
    let request = URLRequest(url: URL(string: "https://www.mlb.com?event=\(event.info.identifier)")!)
    let settings = TMTicketsModule.WebpageSettings(pageTitle: "MLB Homepage",
                                                   urlRequest: request,
                                                   oauthCookieSettings: cookie)

    // build buttons
    let button1 = TMTicketsModule.ActionButton(title: "One",
                                               webpageSettings: settings)

    // build module with header and buttons
    let module = TMTicketsModule(identifier: "com.myDemoApp.demoModule",
                                 headerDisplay: nil, // no header
                                 actionButtons: [button1])

    // return module
    completion([module])
}
Pre-Built Modules
A few basic modules have already been created for you, see: iOS PreBuilt Modules
API Documentation
For more options see: iOS API Documentation
Was this article helpful?