Migrating from Legacy Purchase SDK to Retail SDK (iOS)
If your app uses our legacy Purchase SDK offered through June 2023 to show Event Detail Page and purchase flow, this is how you can migrate the code base to use Retail SDK (part of Ignite) instead. While Purchase is now part of Retail, the actual interfaces did not change very much.
Downloading the SDK
Previously, Purchase SDK was downloaded as a zip file that contains three xcframeworks (TicketmasterDiscoveryAPI.xcframework, TicketmasterFoundation.xcframework, TicketmasterPurchase.xcframework). Now, the modules are downloaded using Swift Package Manager. The ones you need to add to your target are the same three (TicketmasterDiscoveryAPI, TicketmasterFoundation, TicketmasterPurchase) plus TicketmasterAuthentication. For more details on how to do this, see our article on adding Ignite Swift package.
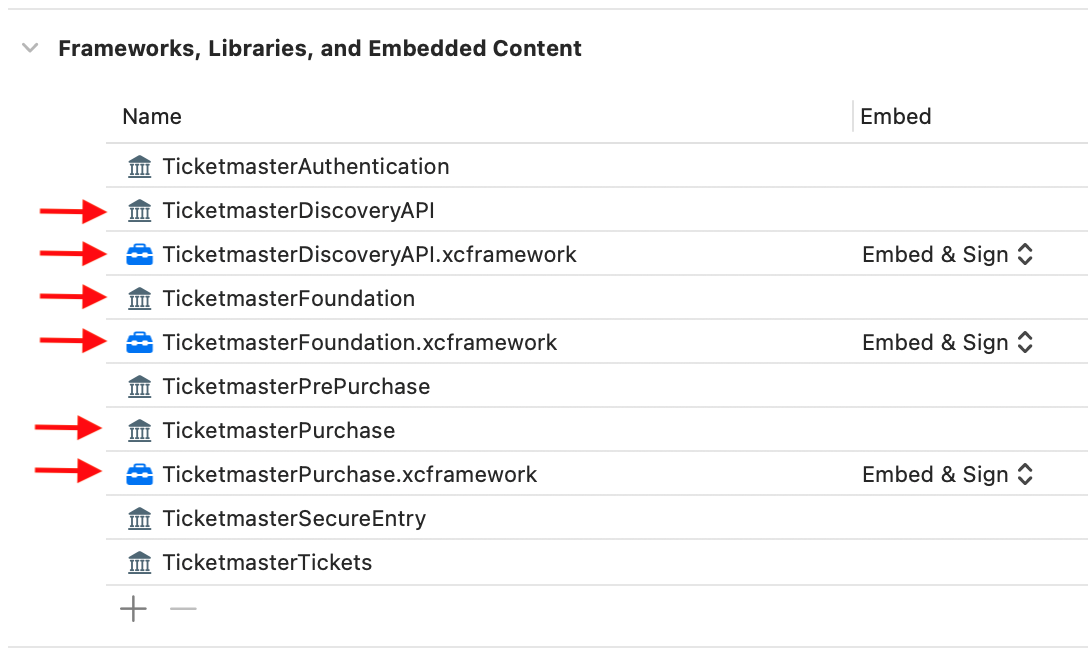
Remember to delete the old xcframework dependencies from your target, or you will get the duplicate symbols build error. Here's an example showing the duplicates. The blue ones (xcframeworks) need to be deleted.
Configuration
If your app used the old Purchase SDK, you might have set it up like this:
import TicketmasterPurchase

TMPurchase.shared.apiKey = "<MyAPIKey>"
To migrate to Purchase framework of Retail SDK, you don't need to do anything different in the setup portion, because this part remains the same!
Showing Event Detail Page (and Subsequently Checkout)
In the old Purchase SDK, you might have done it like this to bring up an Events Detail Page (EDP) and the subsequent purchase flow:
let eventId = "1C005E7FAF5D45BF"
let config = TMPurchaseWebsiteConfiguration(eventID: eventId)

let purchaseVC = TMPurchaseNavigationController(configuration: config)

// If you used Purchase SDK in conjunction with PSDK, you might also have this line.
purchaseVC.oauthDelegate = PSDK.shared.oauthProvider

present(purchaseVC, animated: true)
In Ignite, you can keep things largely the same. We do have a new convenience function to create a TMPurchaseNavigationController without creating TMPurchaseWebsiteConfiguration but the old way is still available for more customized setup. Here's the new way:
let eventId = "1C005E7FAF5D45BF"
let purchaseVC = TMPurchaseNavigationController.eventDetailsNavigationController(eventIdentifier: eventId)

present(purchaseVC, animated: true)
Also, you no longer need to set the oauthDelegate to handle login scenarios. However, you do need to set up TMAuthentication prior to using TMPurchase, because the user is required to log in in order to complete purchase.
Below is a basic example of setting up TMAuthentication. That said, many of our clients of the legacy Purchase SDK also handle login using our legacy Presence SDK (PSDK). If you have already migrated from PSDK to the new Accounts SDK (part of Ignite) as described in our Presence SDK Migration, iOS guide, you already have this part covered.
TMAuthentication.shared.configure(apiKey: "<MyAPIKey",
                                          region: .US) { backendsConfigured in
        print("TMAuthentication config success")
    } failure: { error in
        print("TMAuthentication config failure: \(error)")
    }
}
More Details
This article is meant to be a quick guide covering key points of migrating from the old Purchase SDK to the new Retail SDK (part of Ignite). For more detailed API documentation that describes each class and function, please refer to the DocC archive that was downloaded as part of the Swift package. See our API Documentation, iOS article on how to locate the DocC archives inside Xcode.